comment
comment:
  enable: false
  use: waline # values: waline | gitalk | twikoo

  # Waline
  # See: https://waline.js.org/guide/get-started.html
  waline:
    serverUrl:  # Waline server url(vercel) example: https://example.example.com
    lang: zh-CN # Waline language, default: zh-CN. See: https://waline.js.org/guide/client/i18n.html

  # Gitalk
  # See: https://github.com/gitalk/gitalk
  gitalk:
    github_id: # GitHub repo owner
    repository: # Repository name to store issues
    client_id: # GitHub Application Client ID
    client_secret: # GitHub Application Client Secret

  # Twikoo
  # See: https://github.com/imaegoo/twikoo
  twikoo:
    visitor: true
    env_id: # Vercel or Tencent Cloud Function environment ID
    region: # environment region. If select Guangzhou, fill in "ap-guangzhou". (optional)
This configuration item is used to enable and set up the theme's comment system.
use
use: waline # values: waline | gitalk | twikoo
To configure which comment system to use, the theme currently comes with Waline, Gitalk, and Twikoo built-in. You can also use another one.
Waline
Waline is a comment system with a backend, derived from Valine. You can consider Waline to be Valine with a backend. It is more secure, fast, concise, and open source compared to Valine. You can find more information at the following websites: https://github.com/walinejs/waline and https://waline.js.org/. If you want to use Waline in the Redefine theme, please see the following information.
To use in Redefine Theme:
LeanCloud Setup (Database)
- Login or register for LeanCloud International Edition and enter the Control Panel.
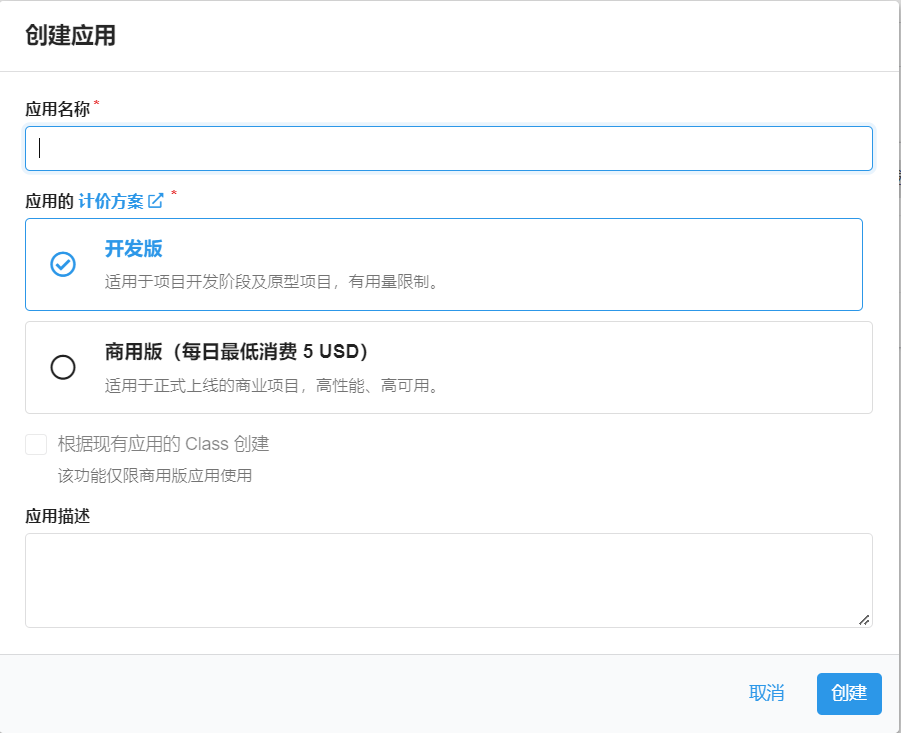
- Click on the top left corner to create an app and name it something you like (choose the free development version):
- Enter the app and select
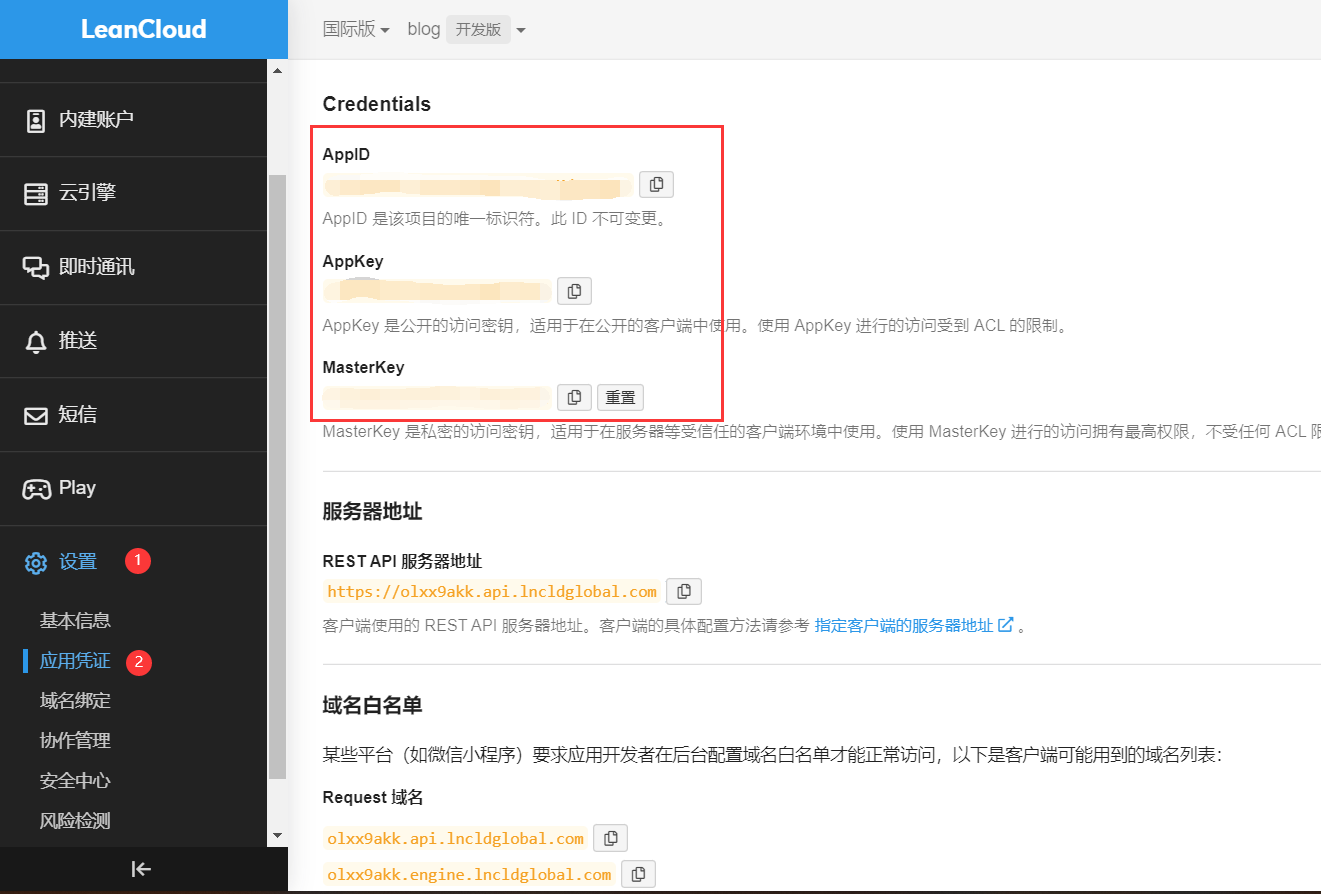
Settings>App Keyfrom the bottom left corner. You will see yourAPP ID,APP Key, andMaster Key. Please record them for later use.
If you are using the domestic version of Leancloud (leancloud.cn) we recommend switching to the international version (leancloud.app). Otherwise, you will need to bind an additional recordal domain name to the app, and purchase a standalone IP and complete recordal access:
- Log in to the domestic version and enter the app you want to use.
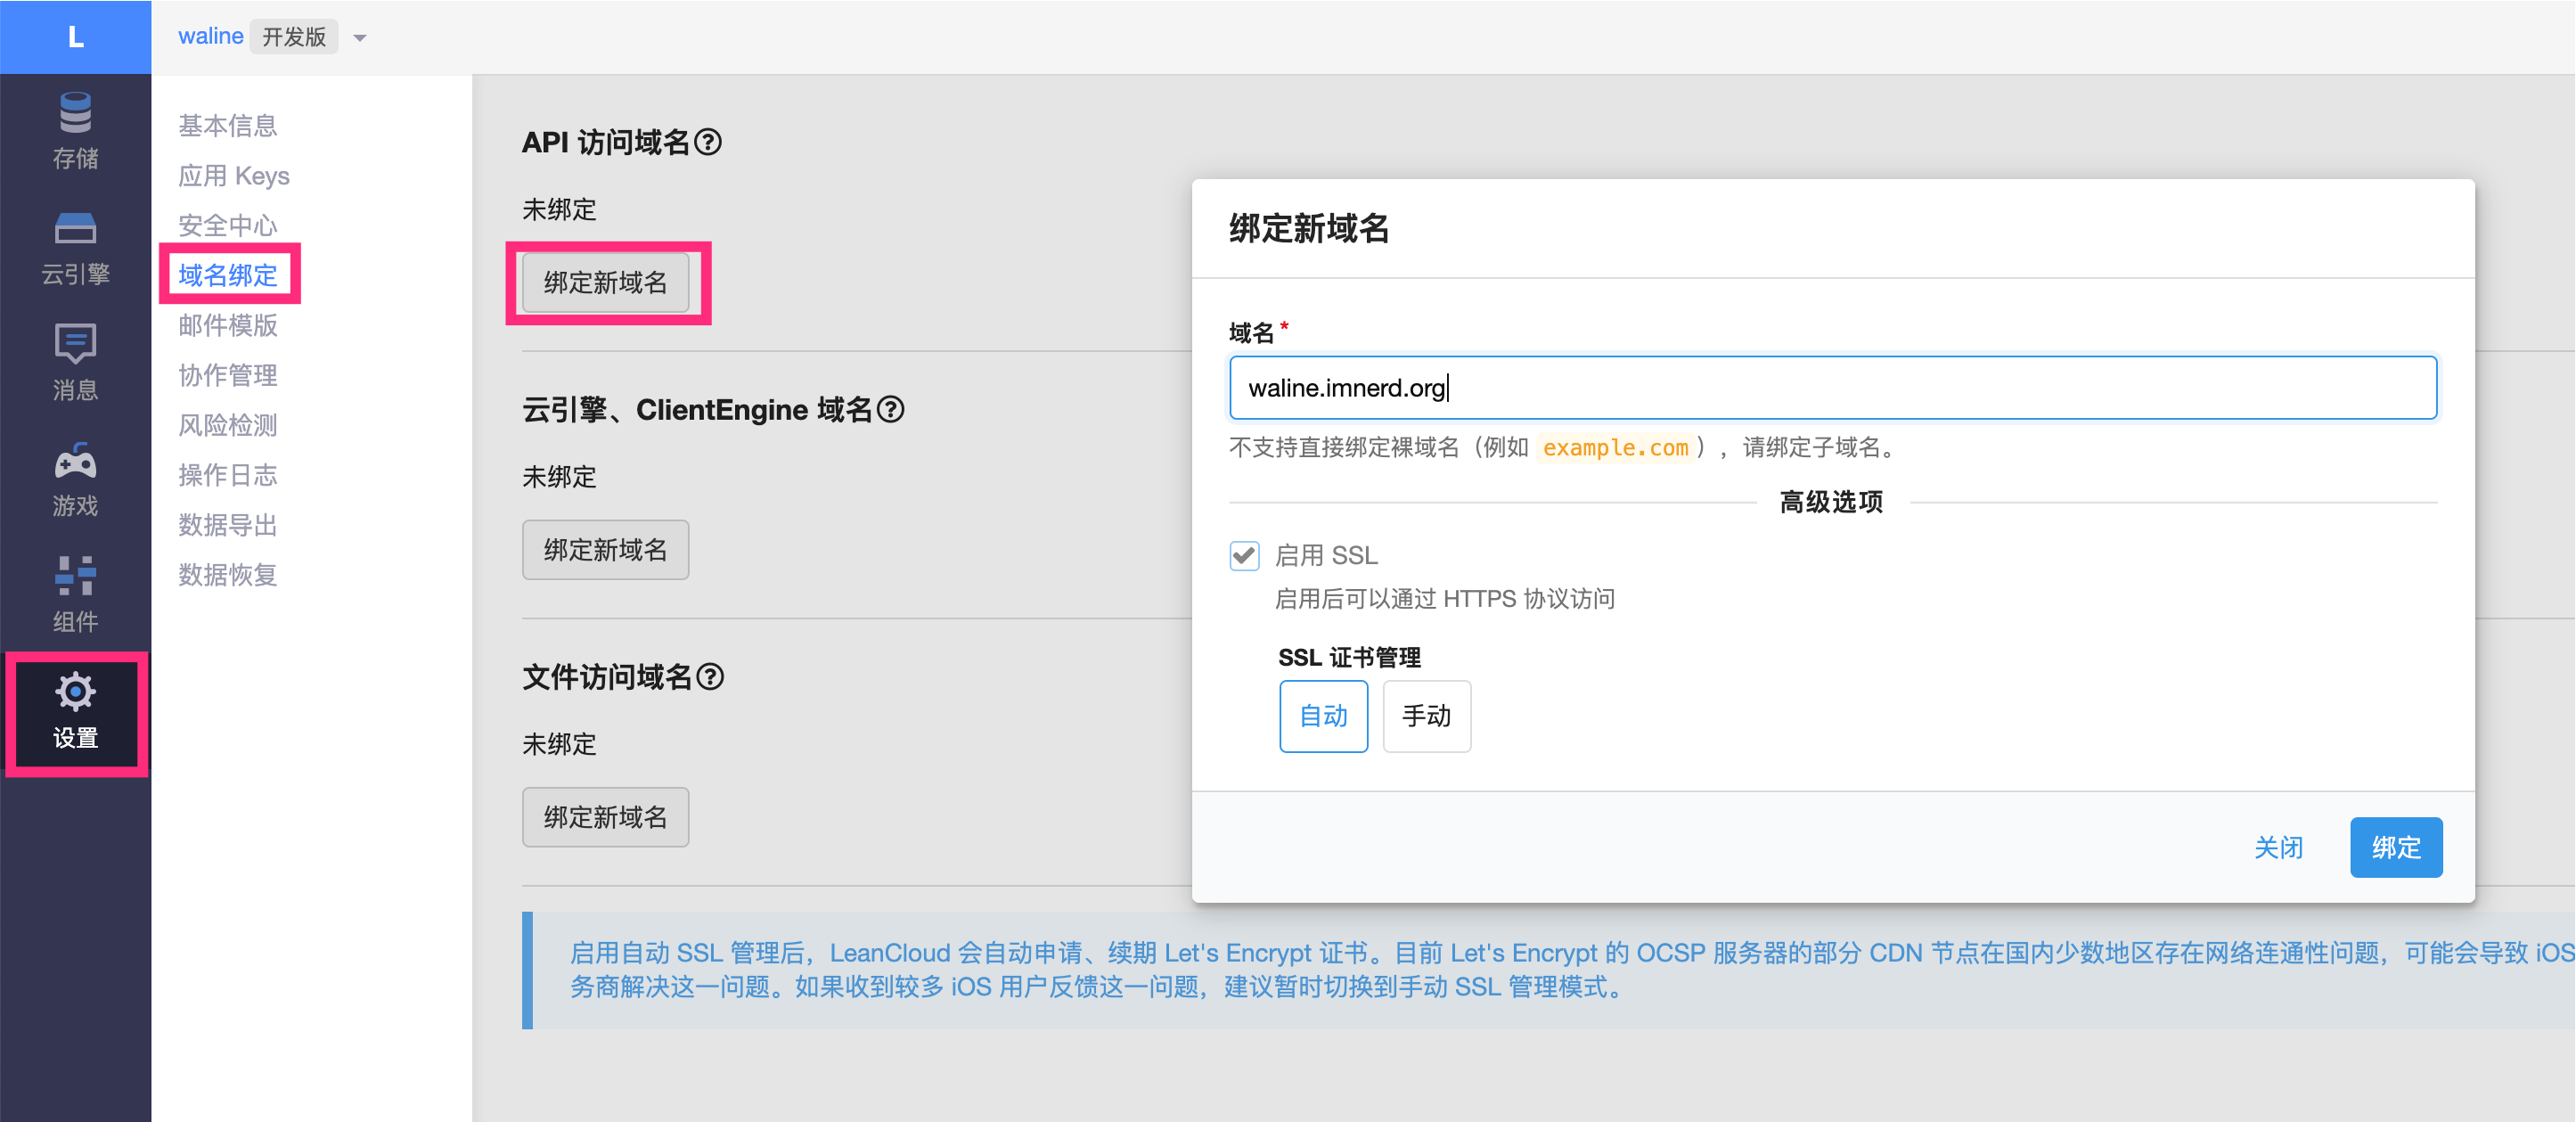
- Select Settings > Domain Binding > API Access Domain > Bind New Domain > Enter Domain > Confirm.
- Follow the instructions on the page to complete the CNAME resolution on DNS.
- Purchase a standalone IP and submit a work order to complete recordal access. (The current price of a standalone IP is ¥ 50/each/month)
Vercel Deployment (Server-side)
- Click the button above to go to Vercel for server-side deployment.
Note: If you are not logged in, Vercel will ask you to register or log in. Please use your GitHub account for quick login.
- Enter a Vercel project name that you like and click 'Create' to continue:
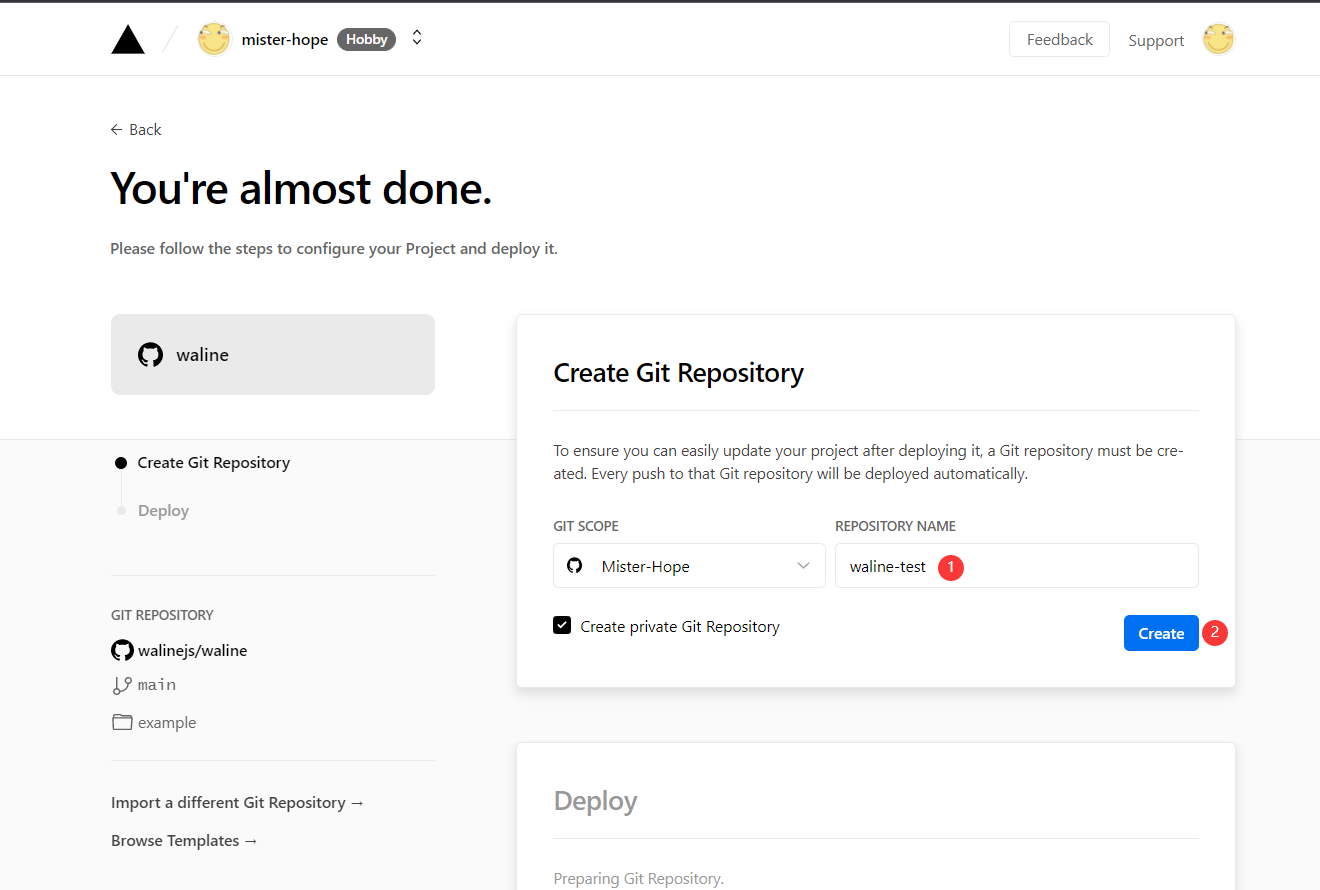
- Vercel will then help you create and initialize a new repository based on the Waline template, with the repository name being the project name you entered earlier.
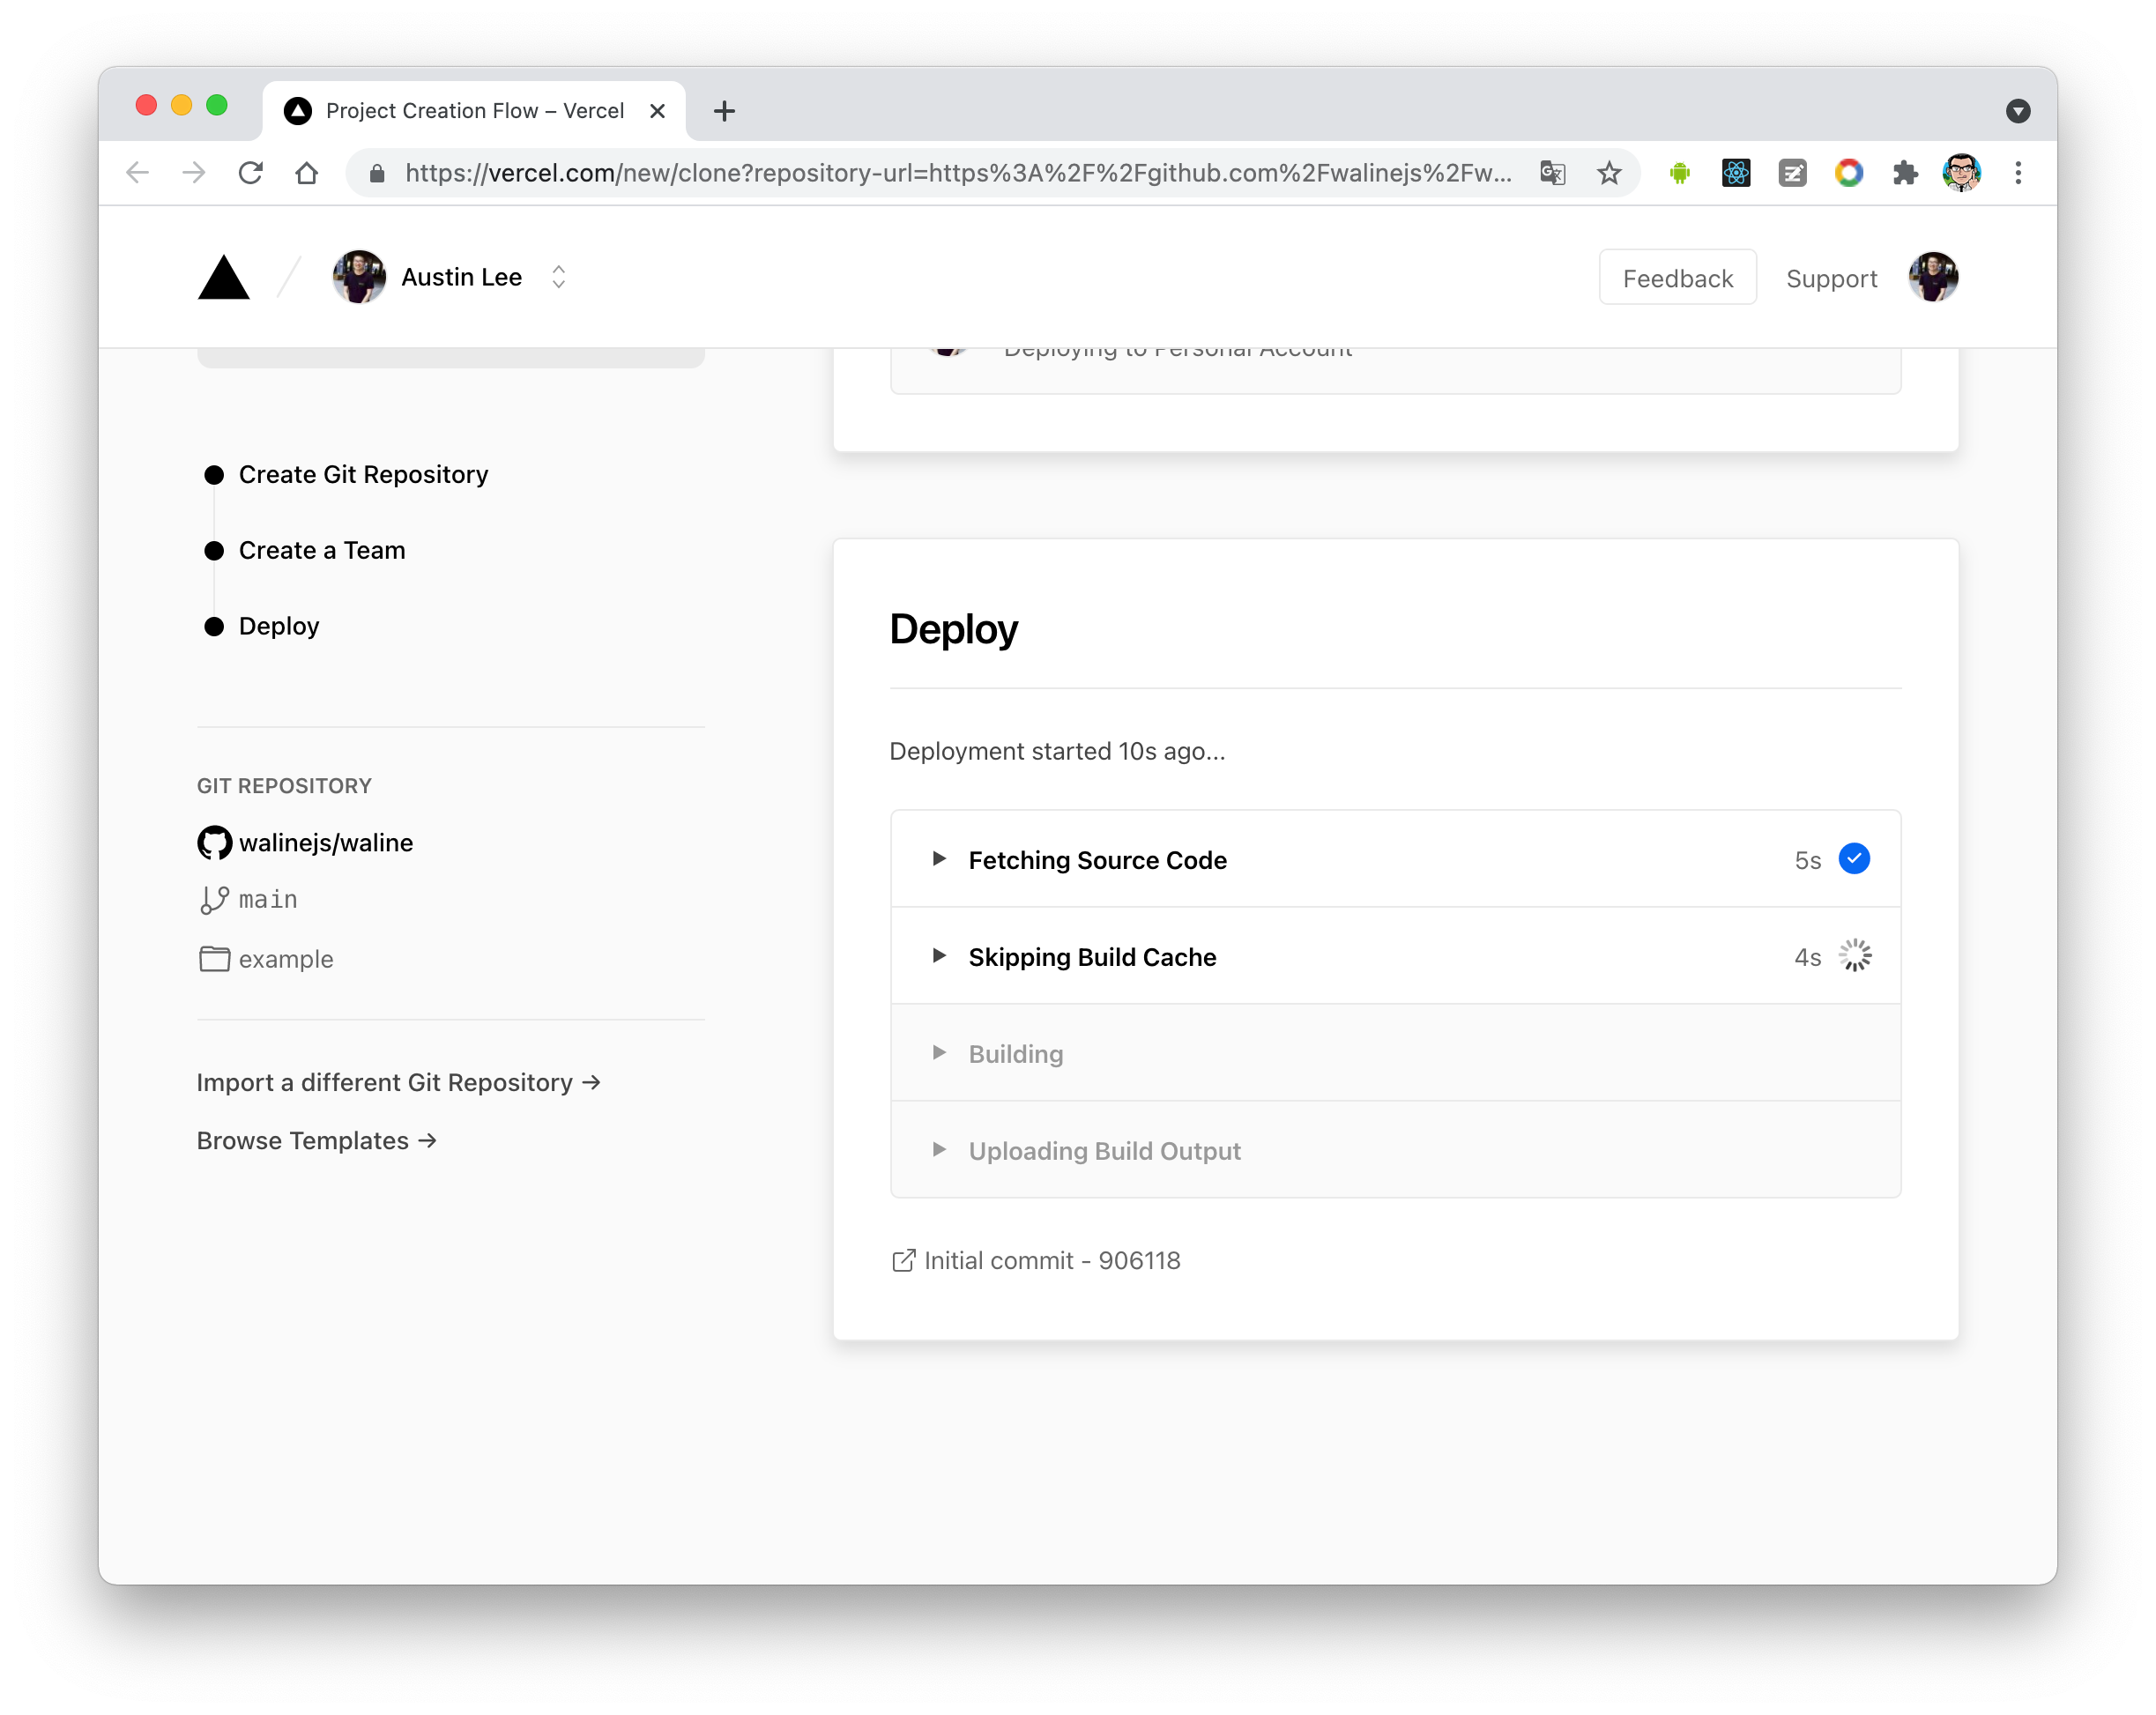
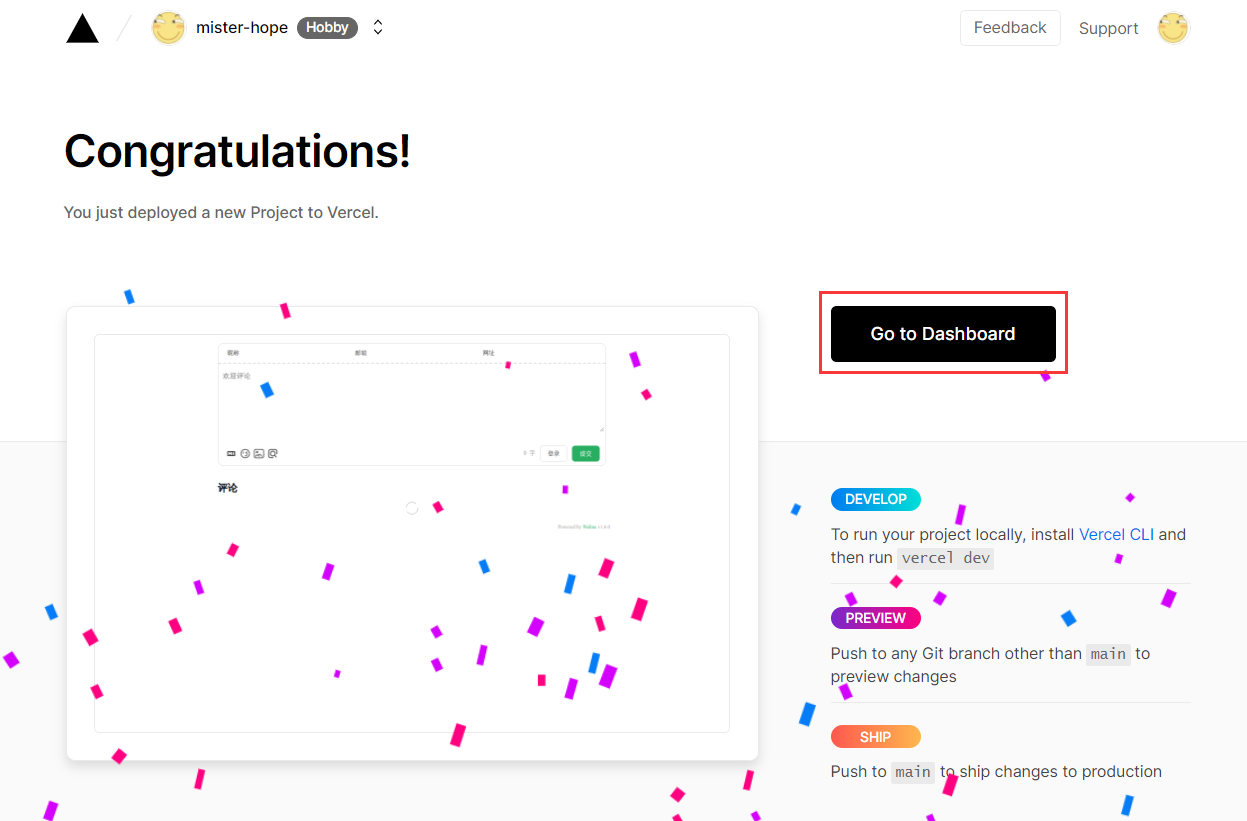
A few minutes later, a full screen of fireworks will celebrate your successful deployment. At this point, you can click 'Go to Dashboard' to jump to the app's control panel.
Click on the top 'Settings' - 'Environment Variables' to enter the environment variable configuration page, and configure three environment variables 'LEAN_ID', 'LEAN_KEY', and 'LEAN_MASTER_KEY'. Their values correspond to the 'APP ID', 'APP KEY', and 'Master Key' obtained in the previous step in LeanCloud.

Note:
If you are using the domestic version of LeanCloud, please also configure the 'LEAN_SERVER' environment variable with the value of the bound domain name.
After the environment variables are configured, click on the top 'Deployments' and click the 'Redeploy' button on the right side of the topmost deployment. This step is to make the set environment variables effective.

This will take you to the 'Overview' screen to start deployment. After a while, the 'STATUS' will change to 'Ready'. At this point, please click 'Visit' to jump to the deployed website address, which is the 'Vercel URL' on the 'Overview' page.
Now you can use your website and enjoy Waline. If you have any questions or suggestions, please feel free to submit an issue or email us.
Bind Domain (Optional)
If you do not want to use the domain name provided by vercel, you can bind your own domain name.
Click 'Settings' - 'Domains' at the top to enter the domain name configuration page.
Enter the domain name you want to bind and click 'Add'.

Add a new 'CNAME' record in the domain server provider.
Type Name Value CNAME example cname.vercel-dns.com Wait for it to take effect, and you can access it through your domain name 🎉
Comment system: example.yourdomain.com
Comment management: example.yourdomain.com/ui

Redefine Theme Settings
In the Redefine theme configuration file, fill in the necessary parameter information (APP ID, APP Key, etc.), as shown in the example below.
waline:
  serverUrl:  # Waline server url(vercel) example: https://example.example.com
  lang: zh-CN # Waline language, default: zh-CN
- 'serverUrl' is required. It is your Vercel domain name (or a custom domain name you have bound).
- 'lang' is required. Comment language, see Waline official documentation #lang
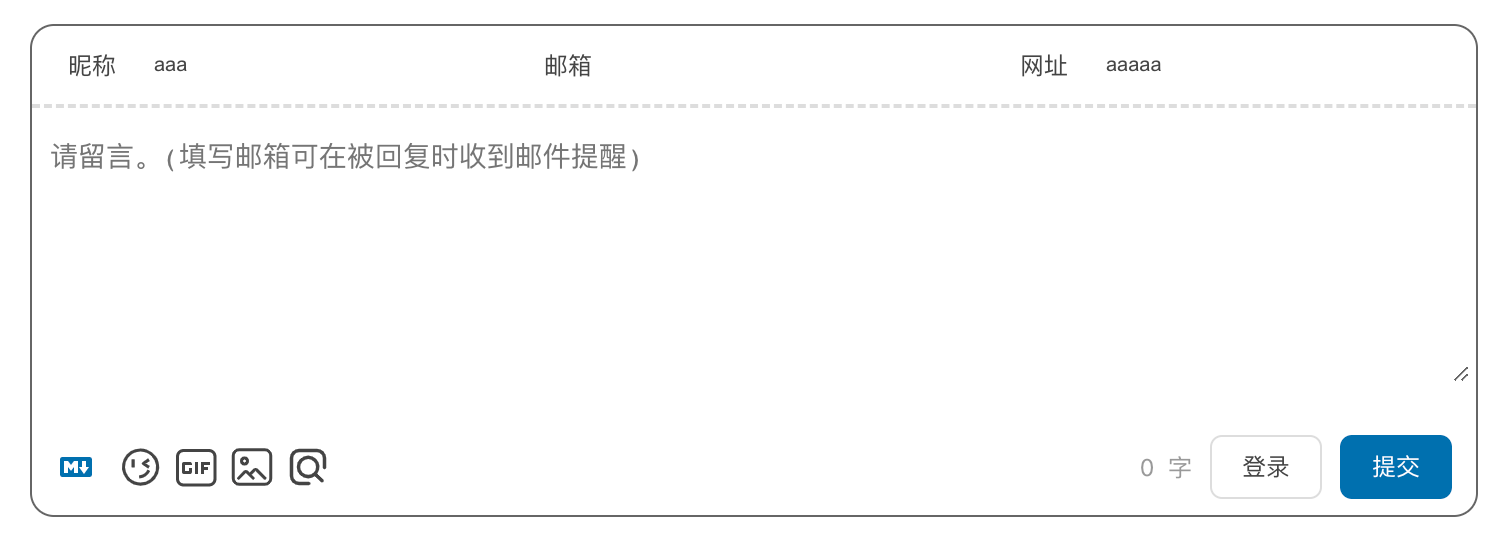
Screenshot of the Waline comment plugin.
Gitalk
Gitalk is a comment plugin based on Github Issue and Preact.
For more information, see:
How to use Gitalk in Redefine:
Create a new GitHub OAuth App Register or log in to GitHub and create a new OAuth App. Fill in the
Homepage URLandAuthorization callback URLwith your own domain.After creating the OAuth App, save the
Client IDandClient Secretfor later use.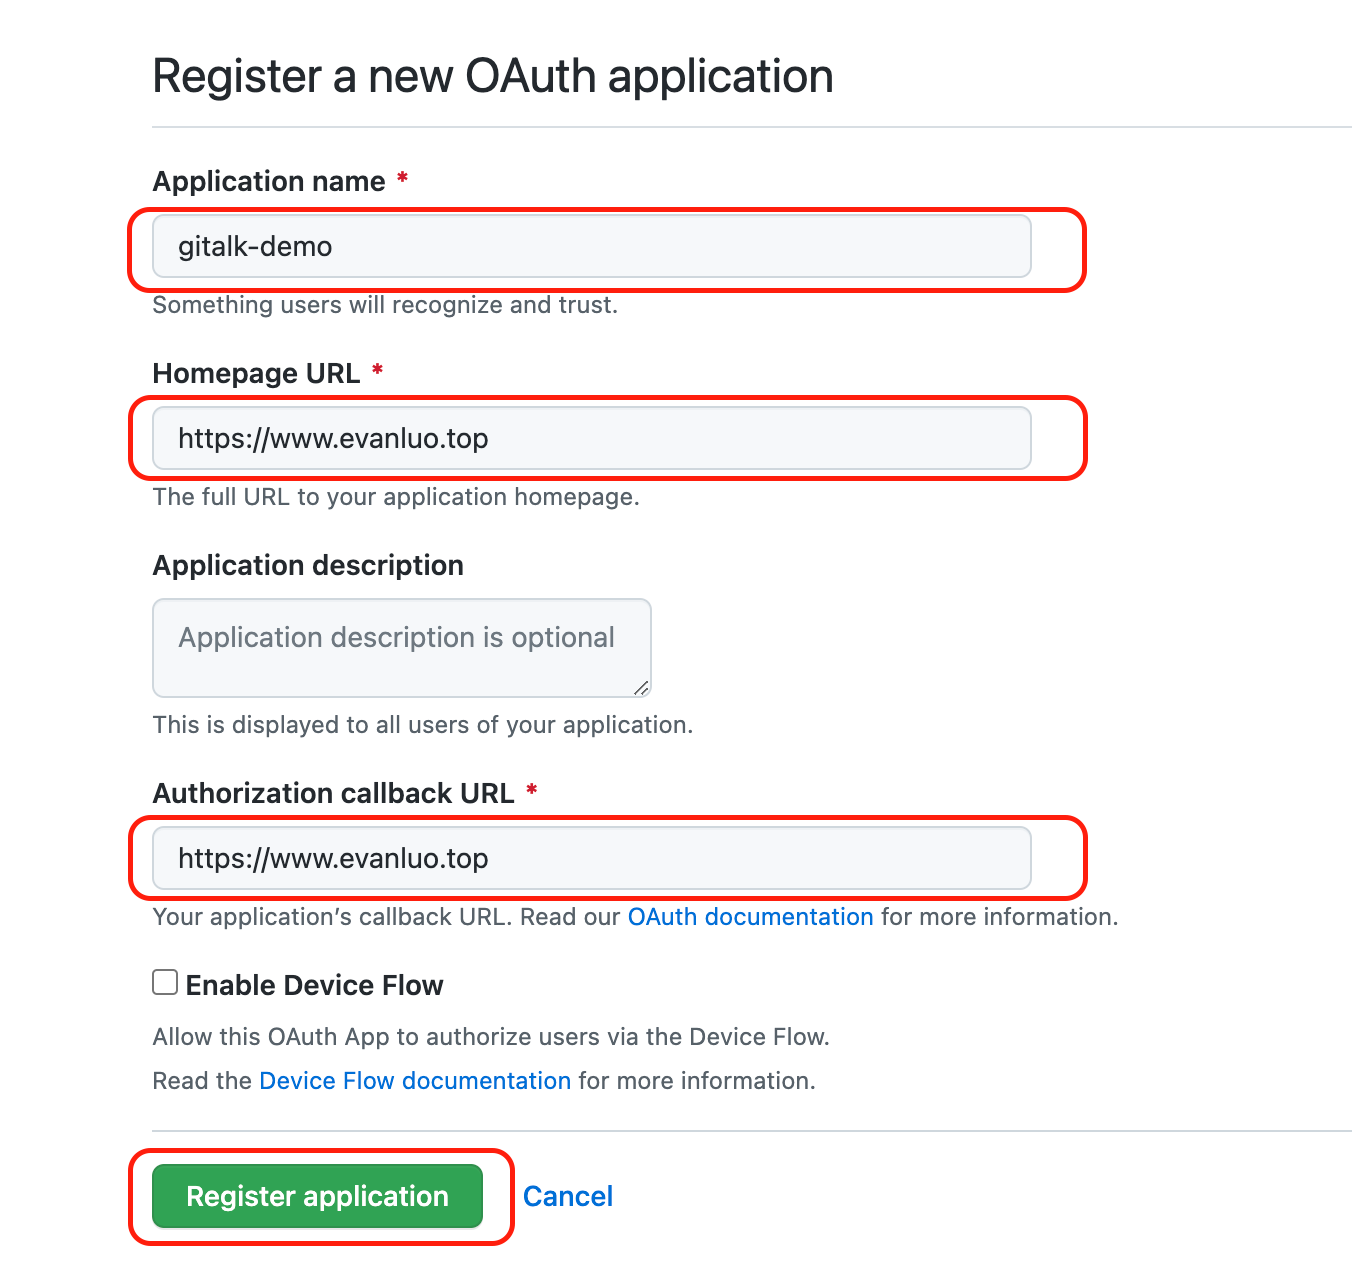
Create a new GitHub repository Register or log in to GitHub, create a new repository and open the Issues. Add a new Issue manually with any content to open it. This repository will be used to store the comments.
Fill in your
GitHub username,repository name, and theClient IDandClient Secretfrom the OAuth App in the theme configuration file, as shown in the following example.gitalk:
github_id: EvanNotFound
repository: hexo-site-comments
client_id: cdfffffffffffffffffffff
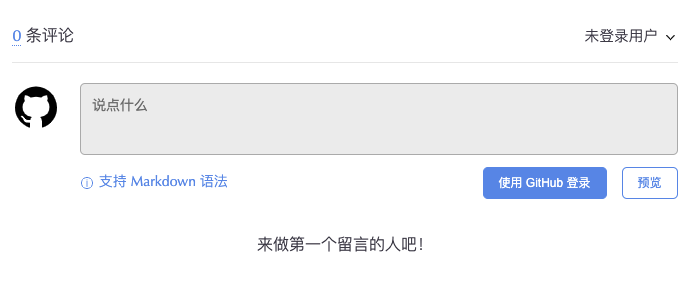
client_secret: f4b55555555555555555555555555555Gitalk comment plugin screenshot:
Twikoo is a simple, secure, and free static website comment system developed by Tencent Cloud.
For more information:
Ex. Tencent Cloud CloudBase tutorial. For other methods, see the Twikoo documentation.
- Recommend creating a Shanghai environment. If you choose the Guangzhou environment, you need to configure
region: ap-guangzhou - Environment name can be freely filled in
- Recommend selecting the billing method
package year and month, package versionbasic class 1, exceeding the free quota will not be charged - If prompted to select an "Application Template", please select "Empty Template"
If you plan to deploy to an existing cloud development environment, please start with step 3.
- Go to the Cloud Development CloudBase event page, scroll down to the "New User Exclusive" section, select the suitable package (generally the 0 yuan package), click "Buy Now", and create the environment as prompted.
- Go to the Cloud Development Console
- Go to Environment - Login Authorization and enable "Anonymous Login"
- Go to Environment - Security Configuration and add the website domain to the "WEB Security Domain"
- Go to Environment - Cloud Function and click "New Cloud Function"
- Please fill in the function name:
twikoo, create method:blank function, runtime environment:Nodejs 10.15, function memory:128MB, click "Next" - Clear the default code in the function editor and copy and paste the code here
exports.main = require('twikoo-func').main
- After creating, click "twikoo" to enter the function details page, then click the "Function Code" tab. Click "File - New File" and enter
package.json, then press Enter. - Copy the following code and paste it into the code box, then click "Save and Install Dependencies".
{ "dependencies": { "twikoo-func": "1.2.0" } }
In the Redefine theme configuration file, fill in the environment ID
env_idtwikoo:
env_id: xxxx-xxxx..........
region:If the Guangzhou environment was selected, the value of
regionmust be filled in asap-guangzhou. IfVercelis used,regioncan be left empty.twikoo:
region: ap-guangzhouTwikoo Example
